Miniature Maze
Miniature Maze
Topic: It's Okay to Change Your Mind
Empowerment Lesson Video: It's Okay to Change Your Mind
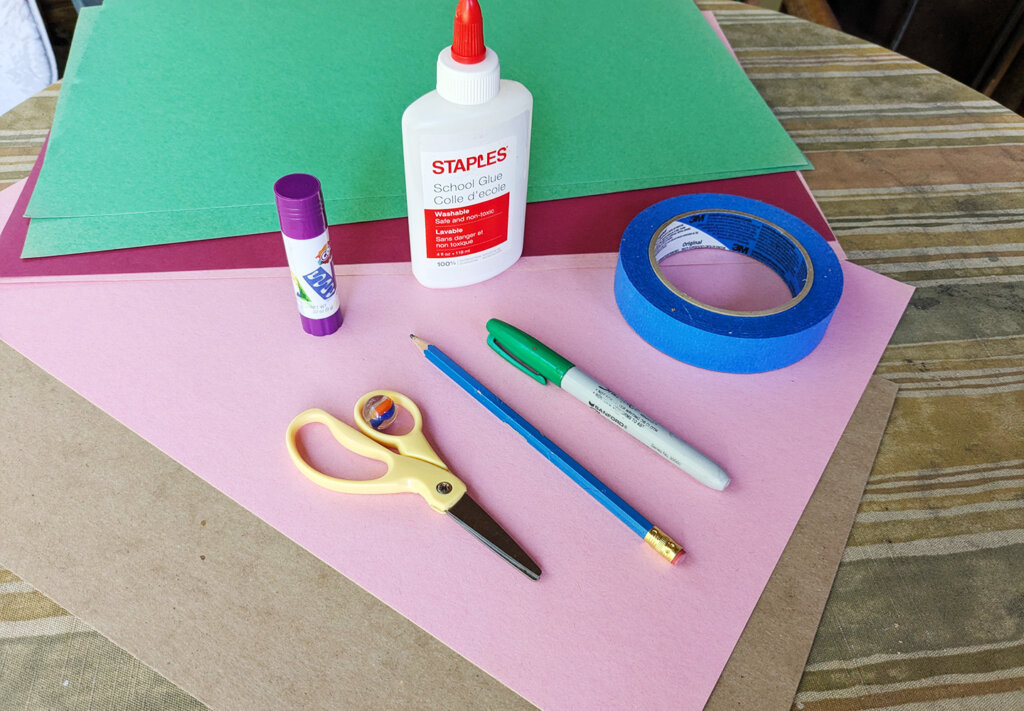
Supplies:
- Pencils, one per student
- Sharpies or similar markers
- Glue, glue sticks, tape, or double-sided tape
- Scissors
- Sheets of cardboard, one per student
- Colored construction paper
- Marbles, one per student
- Optional: craft decoration items such as glitter or stickers
Video Discussion:
Say, “Raise your hand if you’ve ever changed your mind about something.”
Allow any students that want to share their experiences a few moments to do so.
Ask, “How can changing your mind be beneficial?”
Direct students to turn and talk to a partner. Then, call the class back together to share their ideas.
After watching the video It’s Okay to Change Your Mind, use some or all of the following questions to discuss the video content:
- Can you think of a time when you changed your mind about something important? What made you change your mind?
- Why do you think it’s sometimes hard to change your mind even when you learn new information?
- How can changing your mind help you grow and learn?
- Can changing your mind be a sign of strength? Why or why not?
Activity Instructions:
Students will be creating a cardboard maze.
Life is full of twists and turns, just like the maze you'll be creating today.
This cardboard maze represents the idea that sometimes, to find the right path, we need to change our minds and try something new. As you navigate through the maze, you'll find that dead ends become moments where you can change your mind, rethink your approach, and try a new direction.
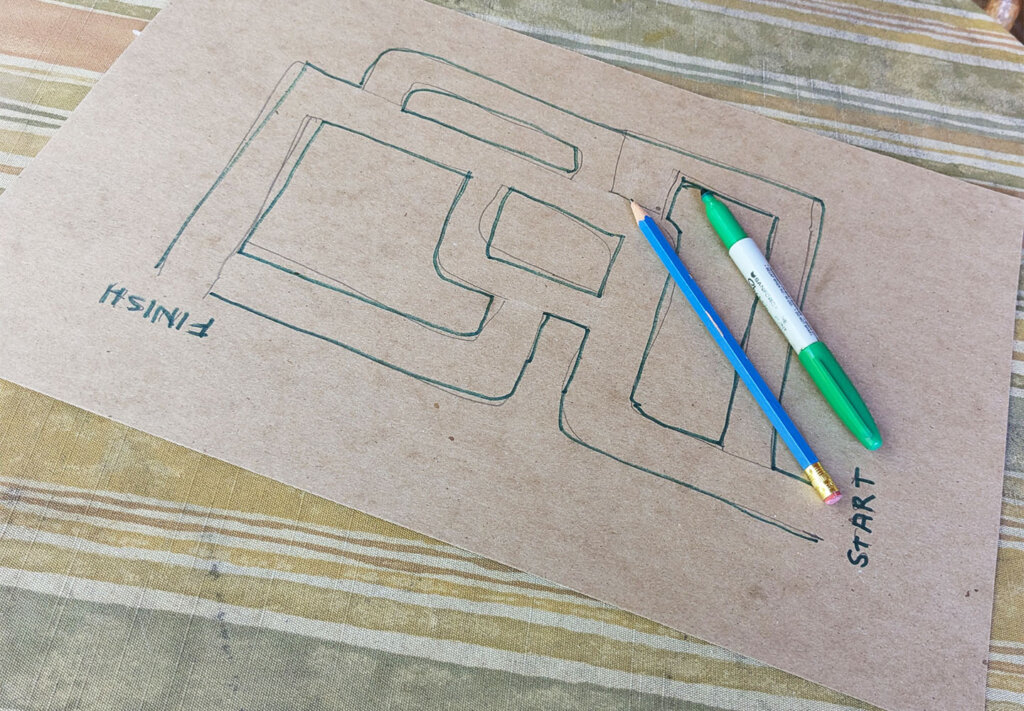
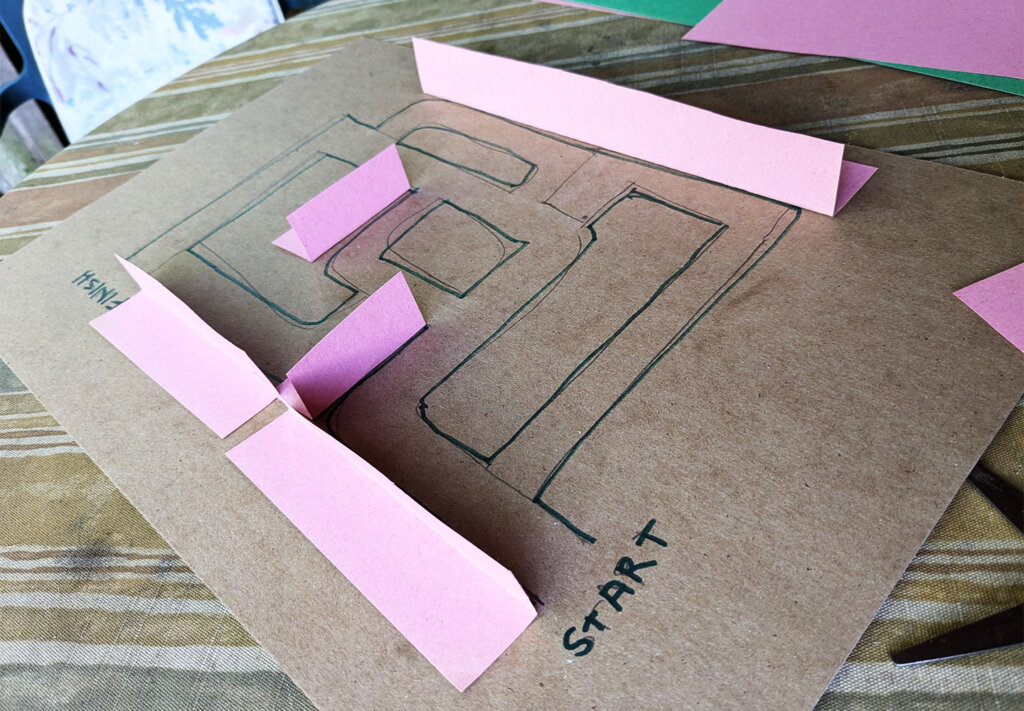
- Select one piece of cardboard to be the base of your maze.
- Use a pencil to sketch the layout of your maze on your maze base. You’ll need to identify the start and end of your maze, a path between them, and some dead ends or other tricky bits. These lines will become the walls of your maze in Step 4.
- Once you’re happy with your design, use the sharpie marker to trace over pencil sketch to draw your final design.
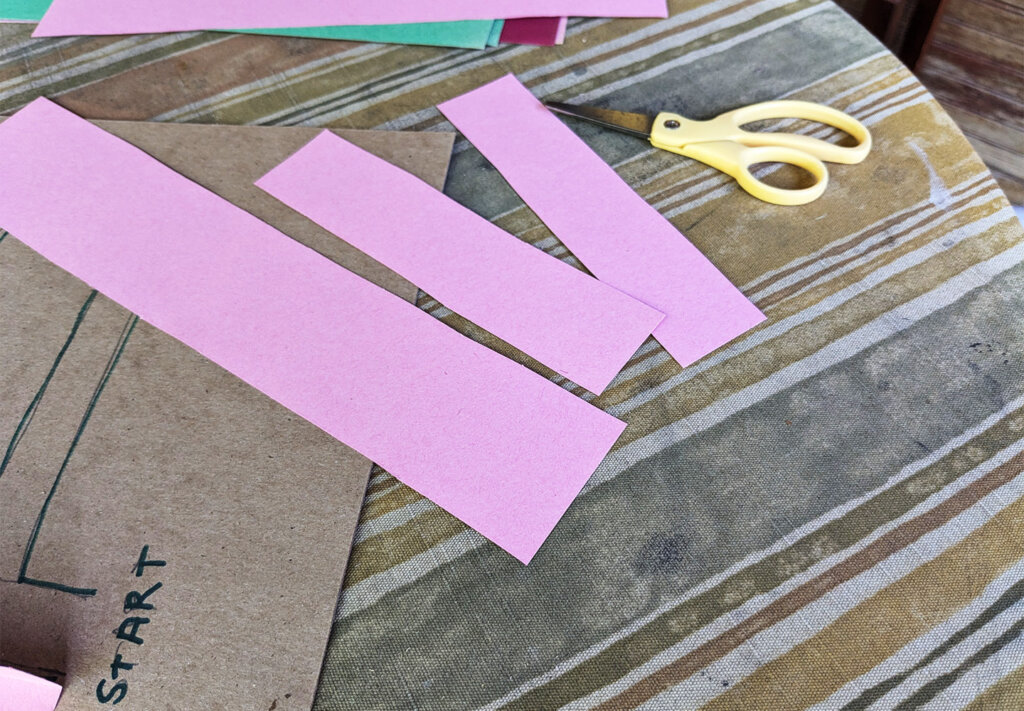
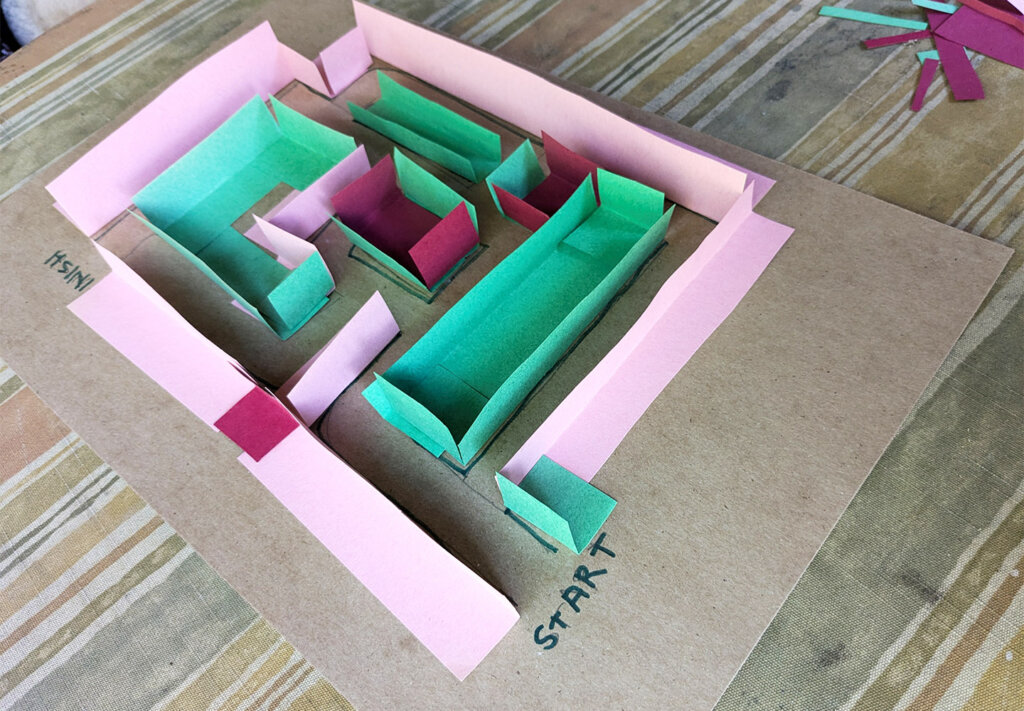
- Cut two-inch strips of construction paper of the color of your choice.
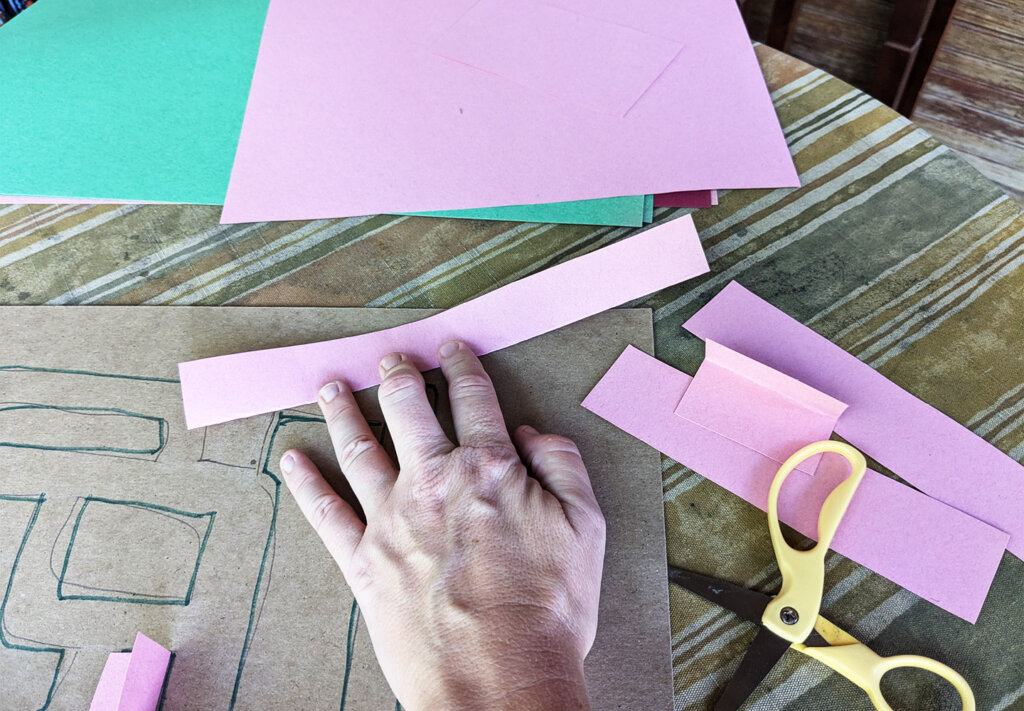
- Trim and fold the construction paper strips to form walls for the maze.
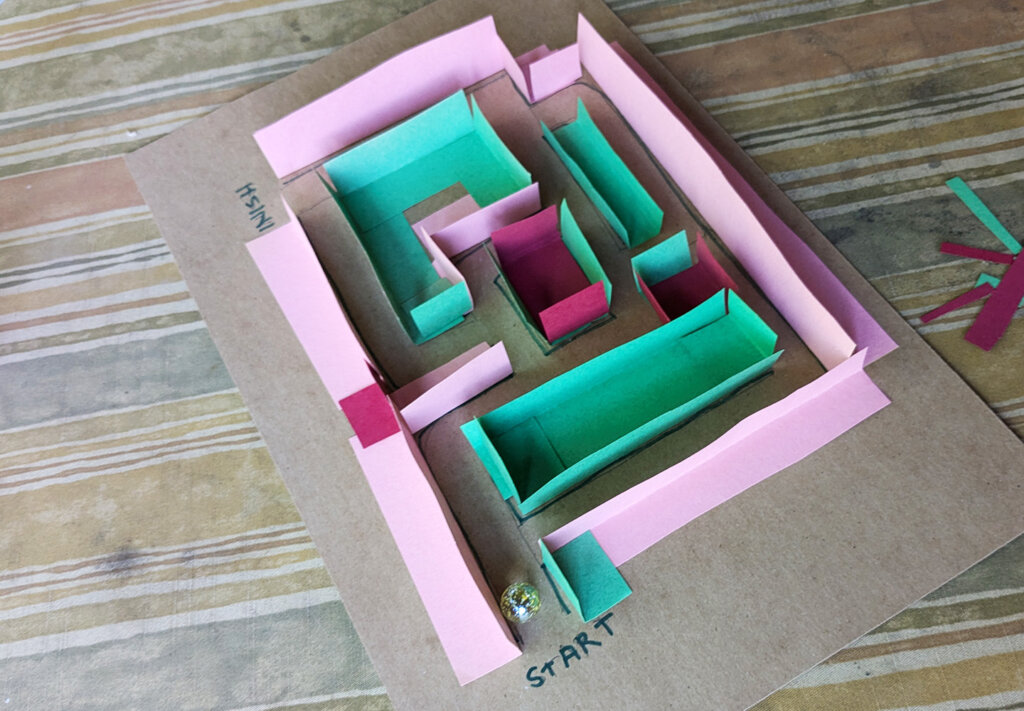
- Start attaching the walls to the cardboard sheet along the lines of the maze with glue or tape. Make sure the spaces between the walls are wide enough for the marble to roll through without getting stuck.
- Be creative and use any color of construction paper walls to complete your maze.
- Optional: To make your maze more fun, consider adding obstacles like small ramps (made from folded paper) or tunnels (cut from toilet paper rolls). You can also decorate your maze with markers, stickers, or drawings that reflect your personality and creativity.
- Once the glue is dry and your maze is complete, drop the marble at the starting point and gently tilt the box to guide the marble through the maze. Make sure the marble can get from start to finish — but not too easily! Adjust any walls or paths if needed.
- Then, trade with other students to try out a variety of different mazes. Remember, just like in life, you’ll sometimes need to change your mind and try a new route!