Light Switch
Light Switch
Topic: Technology Careers
Empowerment Lesson Video: Technology Careers
Supplies:
- Popsicle stick
- Copper foil tape
- LED Light Emitting Diodes
- Coin cell battery 3V-5V
- Small binder clip
- Scissors
- Scotch tape
Video Discussion:
Ask, “When you hear the term ‘technology’, what do you think about?”
Direct students to turn and talk with a partner. Then, allow students to share their thinking with the class.
Ask, “What are some careers in technology?”
Working as a class, create a list of technology careers that students are familiar with. Explain that students will likely learn about even more technology careers in the upcoming video.
Tell the students they will be watching the video Technology Careers. Explain that the video presents role models talking about why girls should consider a career in technology.
Use some or all of the following questions to discuss the video content:
- What new technology careers did you hear about?
- Which technology career sounded the most interesting to you? Why?
- Why might some young women not consider a career in technology? According to the information presented in the video, are those concerns true?
- Many of the technology experts in the video mentioned that careers in technology involve professional positions that pay well. Should earnings be a consideration in what career you prepare for? Why or why not?
- Do you have to be a genius to prepare for a career in technology? How do you know?
Activity Instructions:
Students will explore the basics of circuitry by building a simple light-up switch using everyday materials. This hands-on activity introduces key concepts in electrical engineering and demonstrates how technology careers often involve great attention to detail and problem-solving skills.
Today, you’ll be creating a working circuit using a popsicle stick, copper tape, and an LED! By following the steps to build your own switch, you’ll get a glimpse into how engineers design and power the technology we use every day.
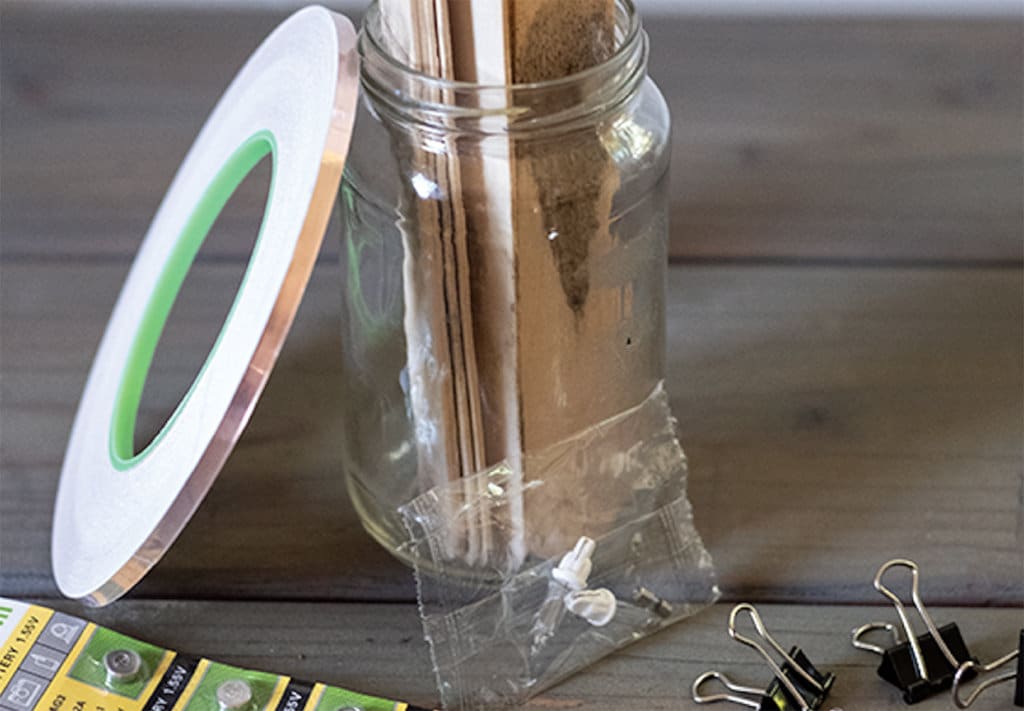
- Gather the materials you need to create your light switch including a popsicle stick, copper foil tape, LED light emitting diodes, a coin cell battery, and a binder clip.
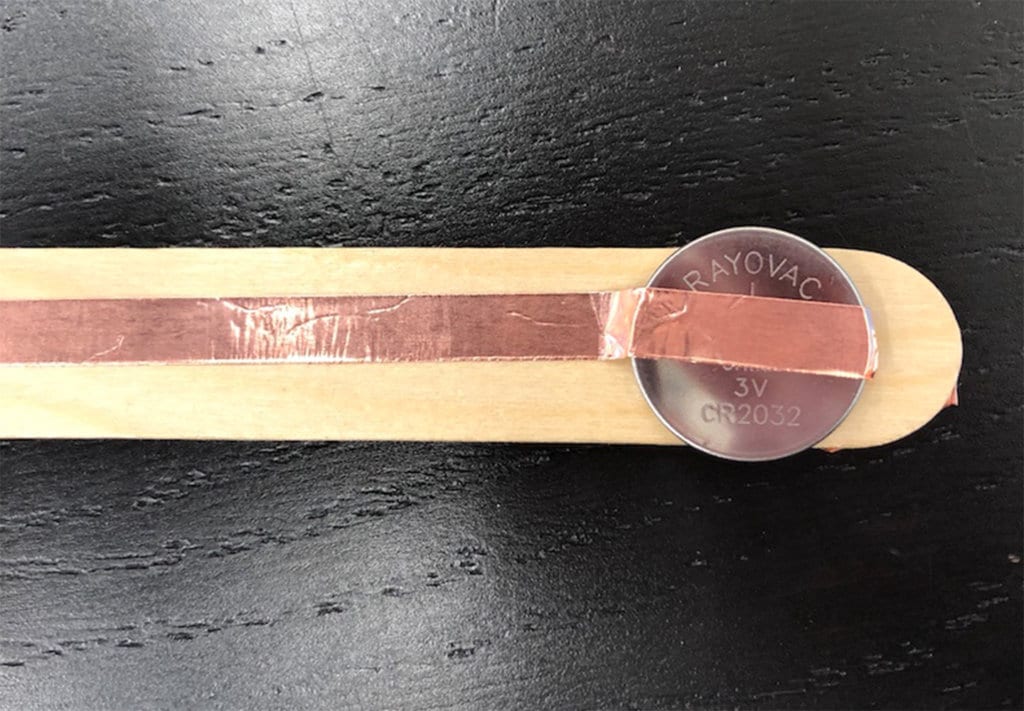
- Place a piece of copper tape lengthwise on both sides of the popsicle stick. The copper tape strip should be long enough to contact the battery when it is placed at the bottom of the stick, but should not come in contact with the binder clip when it is attached.
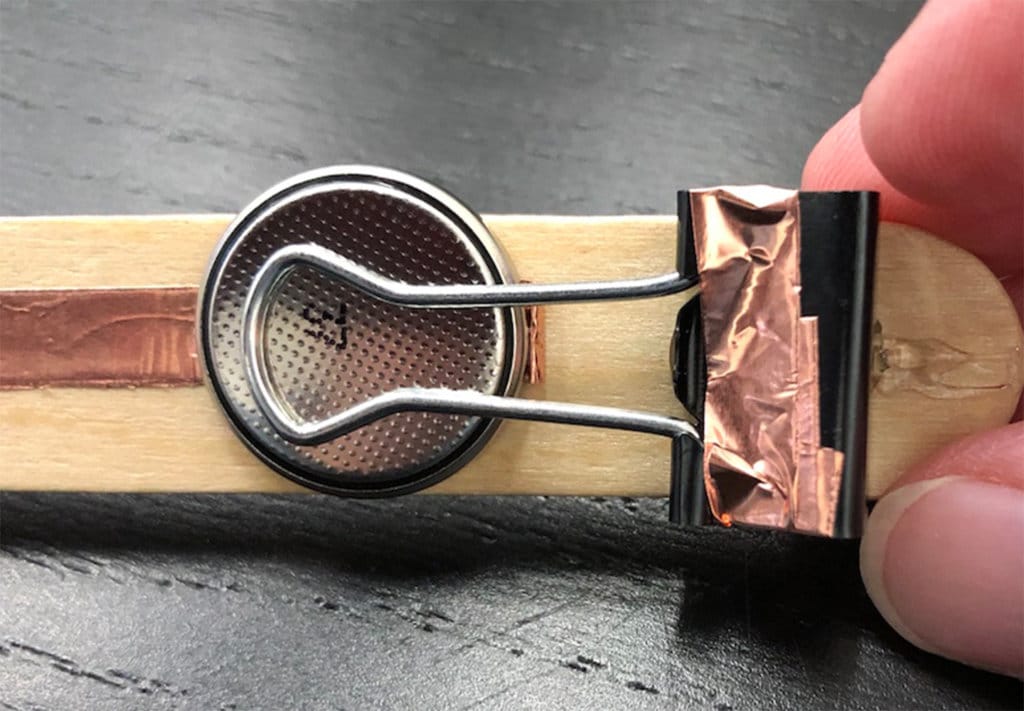
- Attach the binder clip to the bottom of the stick. It should not come in contact with the copper tape, trim tape if necessary.
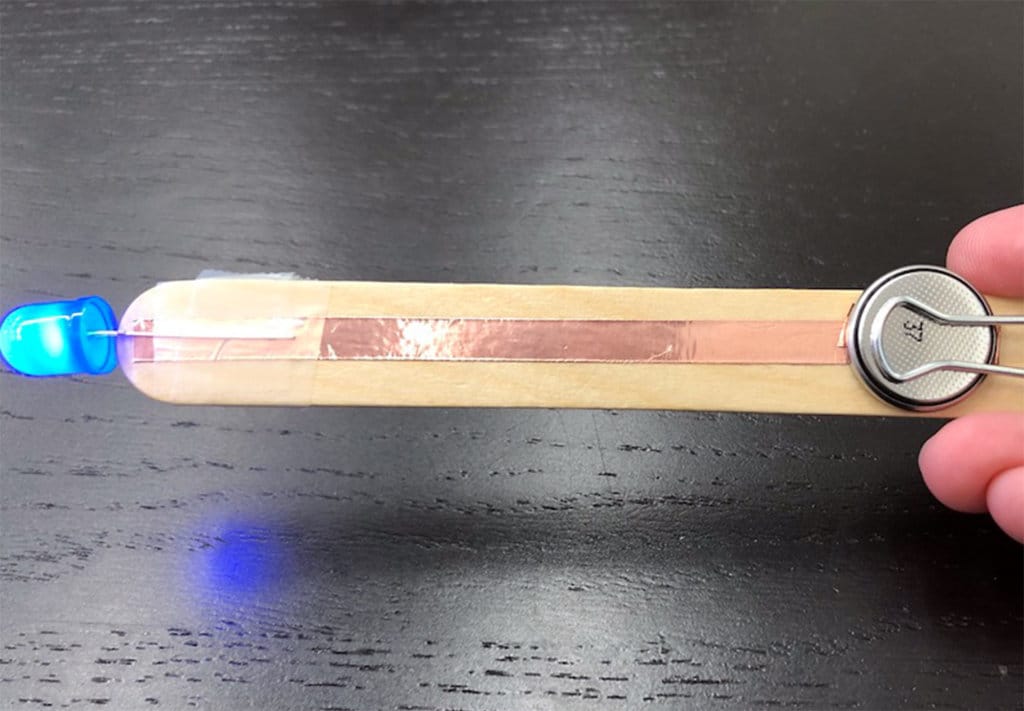
- Attach the LED to the top of the stick, with one of the legs on either side. Tape down the LED or tuck the legs securely underneath the copper tape.
- Tape the battery to the bottom of the copper tape, making sure that the positive + side is facedown, touching the copper tape.
- Flip the metal legs over the binder clip down over the battery. This should cause the LED to light up and the metal legs can be used as a switch to turn the light on and off.
- Take a moment to reflect on how the skills you used today are important in technology careers, where professionals design and build innovative solutions that shape the world around us!