Robotic Hand
Robotic Hand
Topic: Robotics
Empowerment Lesson Video: Robotics Careers
Supplies:
- Cardboard
- Scissors
- Pencil
- Tape
- String
- Straws, a few per student
- Pony beads, five per student
- Ruler
Video Discussion:
Ask, “What is a robot?”
Direct students to turn and talk to a partner, then bring the class together to share their ideas.
Introduce the concept of robotics and the careers that work with and build robots.
Tell the students they will be watching the video Robotics Careers. Explain that the video presents role models discussing their careers in the field of robotics and ideas about robots in the future.
After viewing, ask the students to share something new that they learned about robotics from the video.
Use some or all of the following questions to review the video content and prepare for the activity:
- What is robotics?
- What are some careers you learned about in the field of robotics?
- How does the field of robotics currently help people? How might it help people in the future?
- What is a co-bot? In what way might people use co-bots? Why?
- Where can robots go that are difficult or dangerous for people to go? What do they do in these places?
- What types of jobs do women in the field of robotics have and what are their responsibilities? Which one sounds the most interesting to you? Why?
- Explain how social robots, like Jibo, might be used. What are the positives and negatives of using a social robot in these ways?
Activity Instructions:
This activity introduces students to robotics by giving them hands-on experience with basic engineering concepts. By building a simple robotic hand, students will explore how robots can mimic human movement.
Have you ever wondered how robots can grip, hold, and even move their hands like human hands? In this activity, you’ll design your own robotic hand using everyday materials. Get ready to experiment, build, and see how robotics engineers bring technology to life!
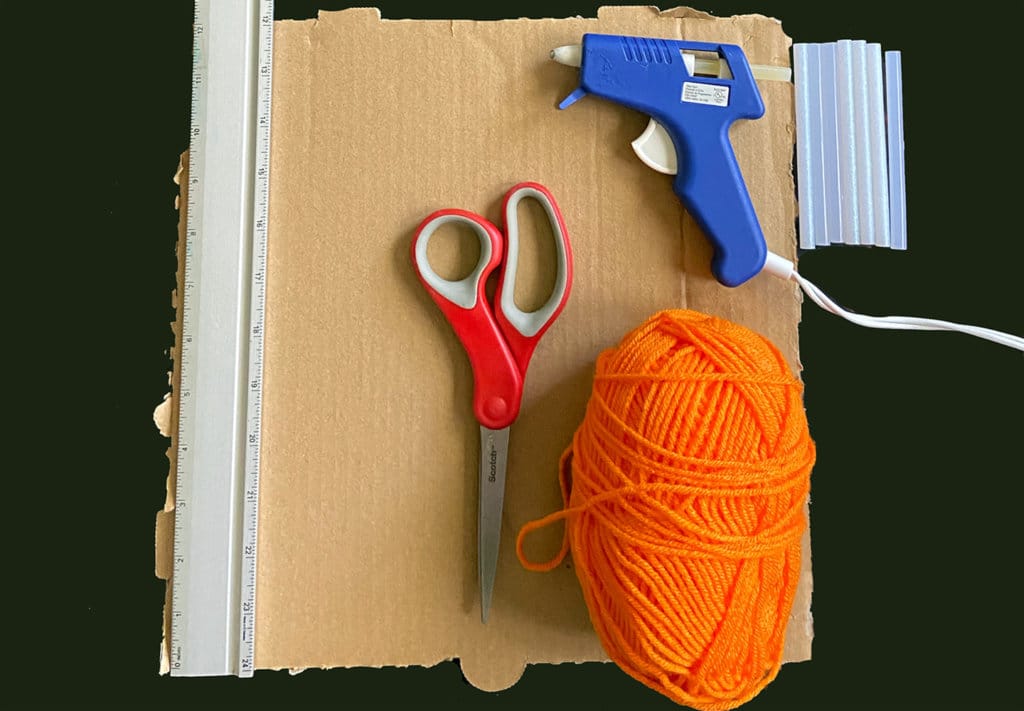
- Gather the materials you will need to create your robot hand including cardboard, scissors, a pencil, straws, string, and tape.
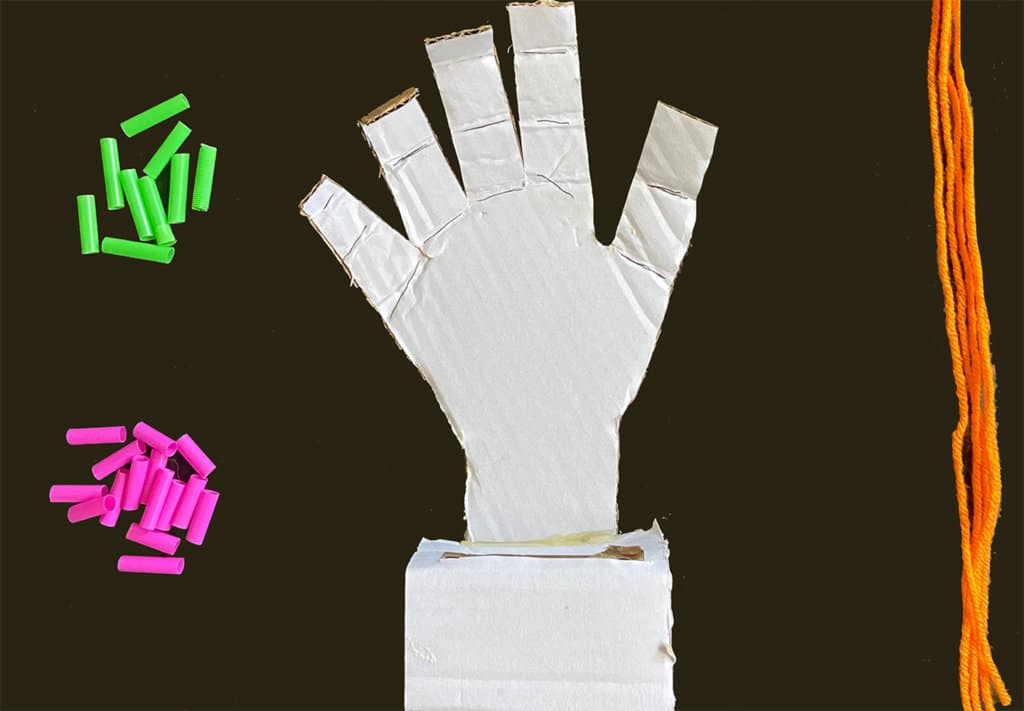
- Trace your hand, wrist, and at least a few inches of your arm on the cardboard. Use scissors to cut it out.
- Cut your straws into 19 pieces. Each piece should measure ½ - ¾ inch in length.
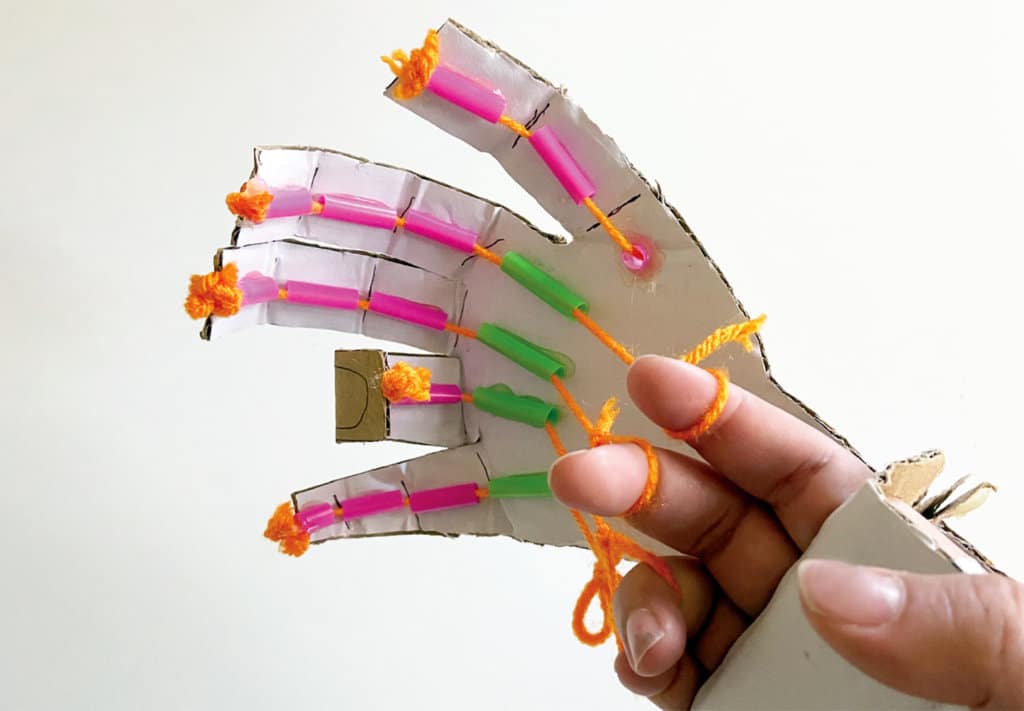
- Use tape to attach the straw pieces to your cardboard hand. You need one straw segment for each section of your finger plus one on the palm of the robotic hand under each finger. Hint: This is two straw segments for your thumb, plus one under the thumb on the palm. Each longer finger needs three straw segments, plus one under each finger on the palm.
- Create a crease in between each straw segment to simulate the bends in your fingers. You can do this by hand or use a ruler to get straighter lines.
- Cut your string into five, 10-inch-long sections.
- Tie one pony bead to the end of each string section.
- Thread each string section through the straw pieces, starting with the fingertips and ending at the palm of the hand. Each finger should be controlled by one string. The pony bead on each string should be located on the fingertip of each finger. Hint: Look at the activity photos if you’re not sure!
- Tie a loop in the part of each string hanging near the palm of the robotic hand. These loops will be your controllers for each finger!
- Cut out a strip of cardboard that measures about 5 inches x 1 inch. Tape this cardboard strip around the wrist portion of your robotic hand. Ensure it is firmly attached to the wrist, and it is secured into either a circle or rectangular shape to serve as your handle.
- Push your hand through the handle, leaving your thumb on the outside. Slip each of the five loops around your corresponding finger. As you pull on each finger, the robotic finger will also move!
- Optional: To make your robotic hand more durable, tape a stick, ruler, or another straw to the back.